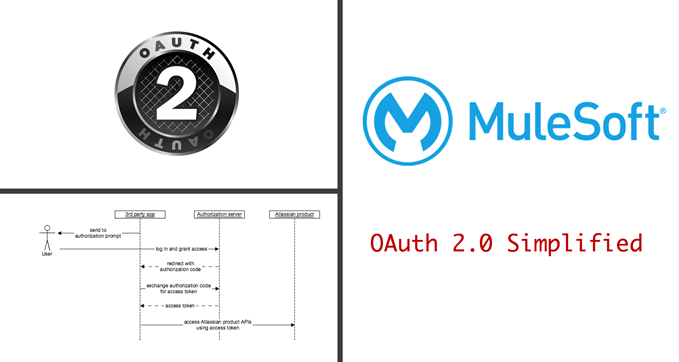
OAuth is the de-facto standard for authentication and authorization. Atlassian recommends the use of OAuth 2.0 (3LO) (also known as “three-legged OAuth” or “authorization code grants” to allow external applications and services to access Atlassian product APIs on behalf of the user. In this article, we are going to see how we can implement the Jira OAuth 2.0 for authentication and authorization using default components provided by MuleSoft.
Step 1: Create the OAuth 2.0 (3LO) App on Atlassian site
Please check out the steps and understanding the auth options at https://developer.atlassian.com/cloud/jira/platform/oauth-2-3lo-apps/
Summary of the key steps is highlighted in the sections below.
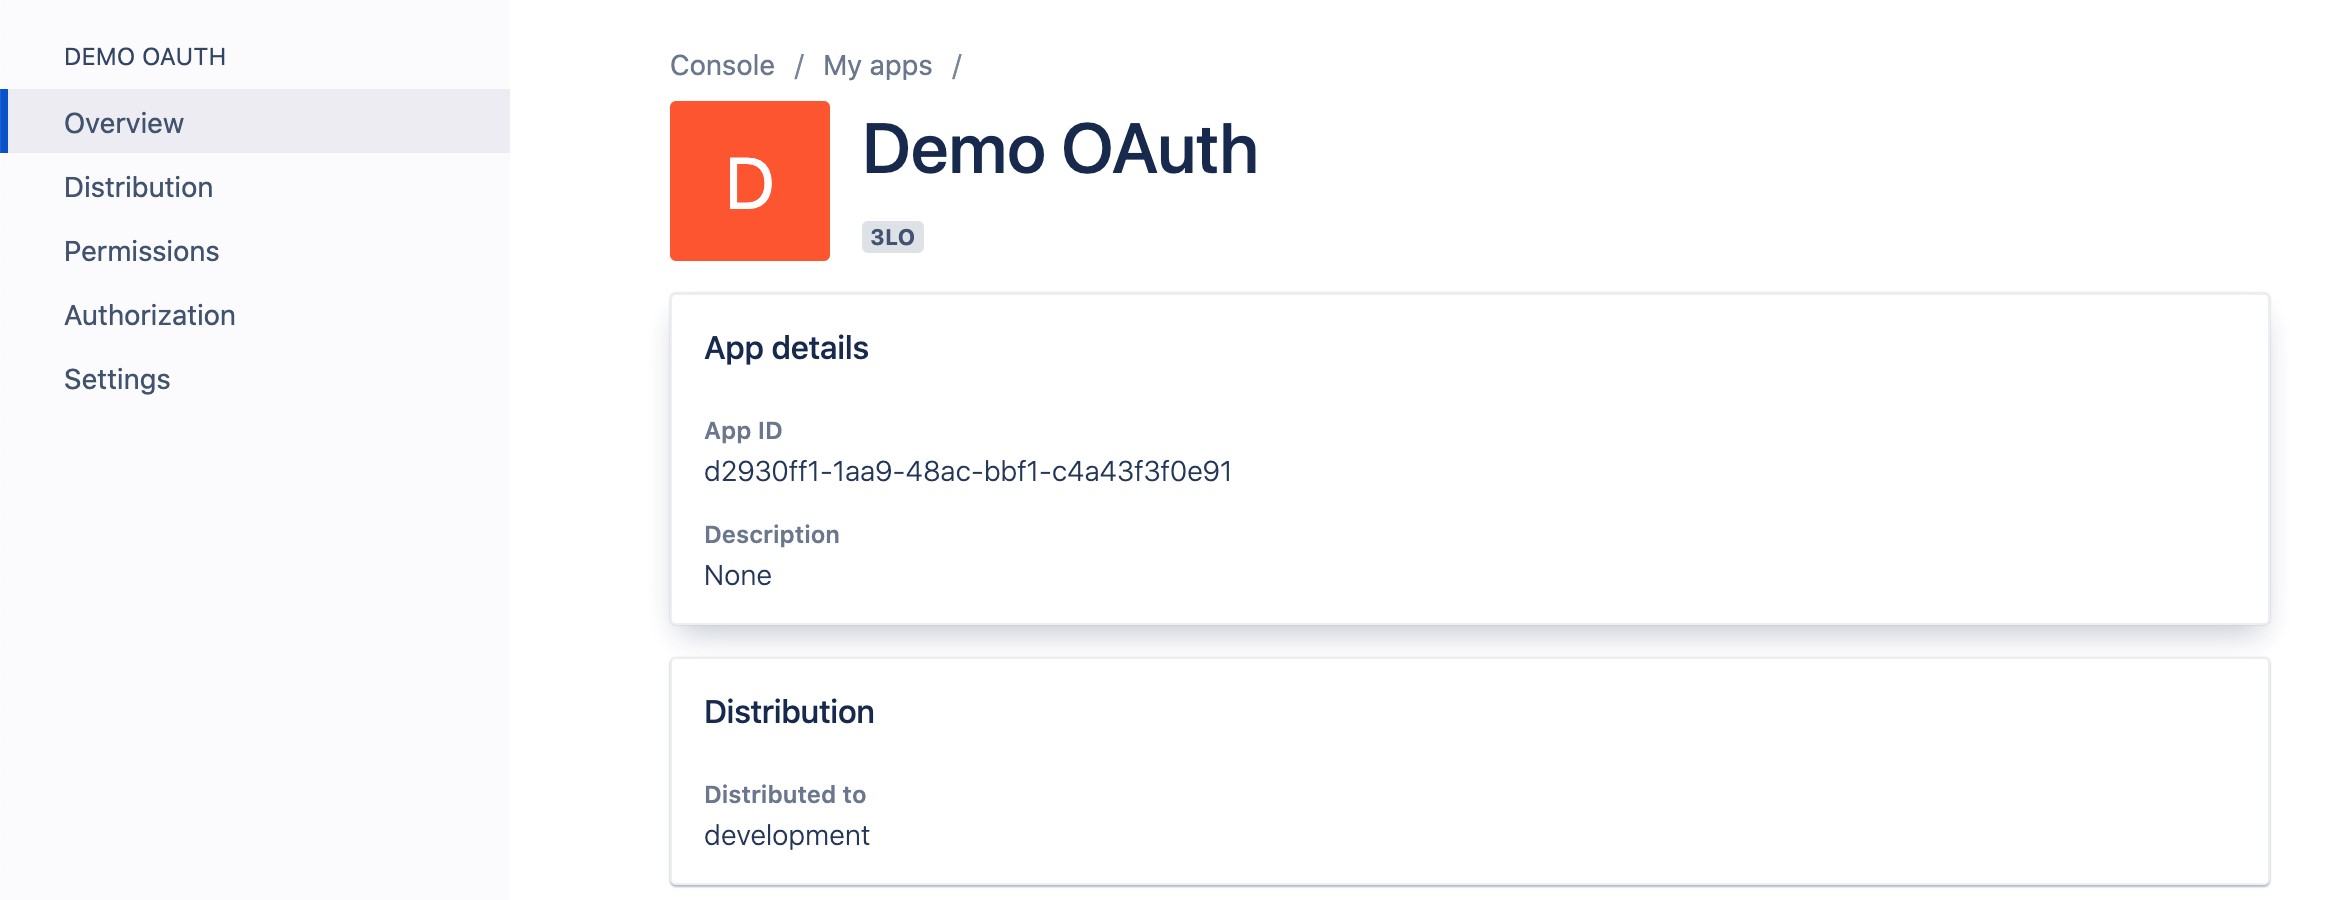
Login to https://developer.atlassian.com and create a new OAuth 2.0 (3LO) app. The key sections/configurations are highlighted below:
- Client ID Secret – this can be looked up after the creation of the app by clicking on the App Details section (like below)
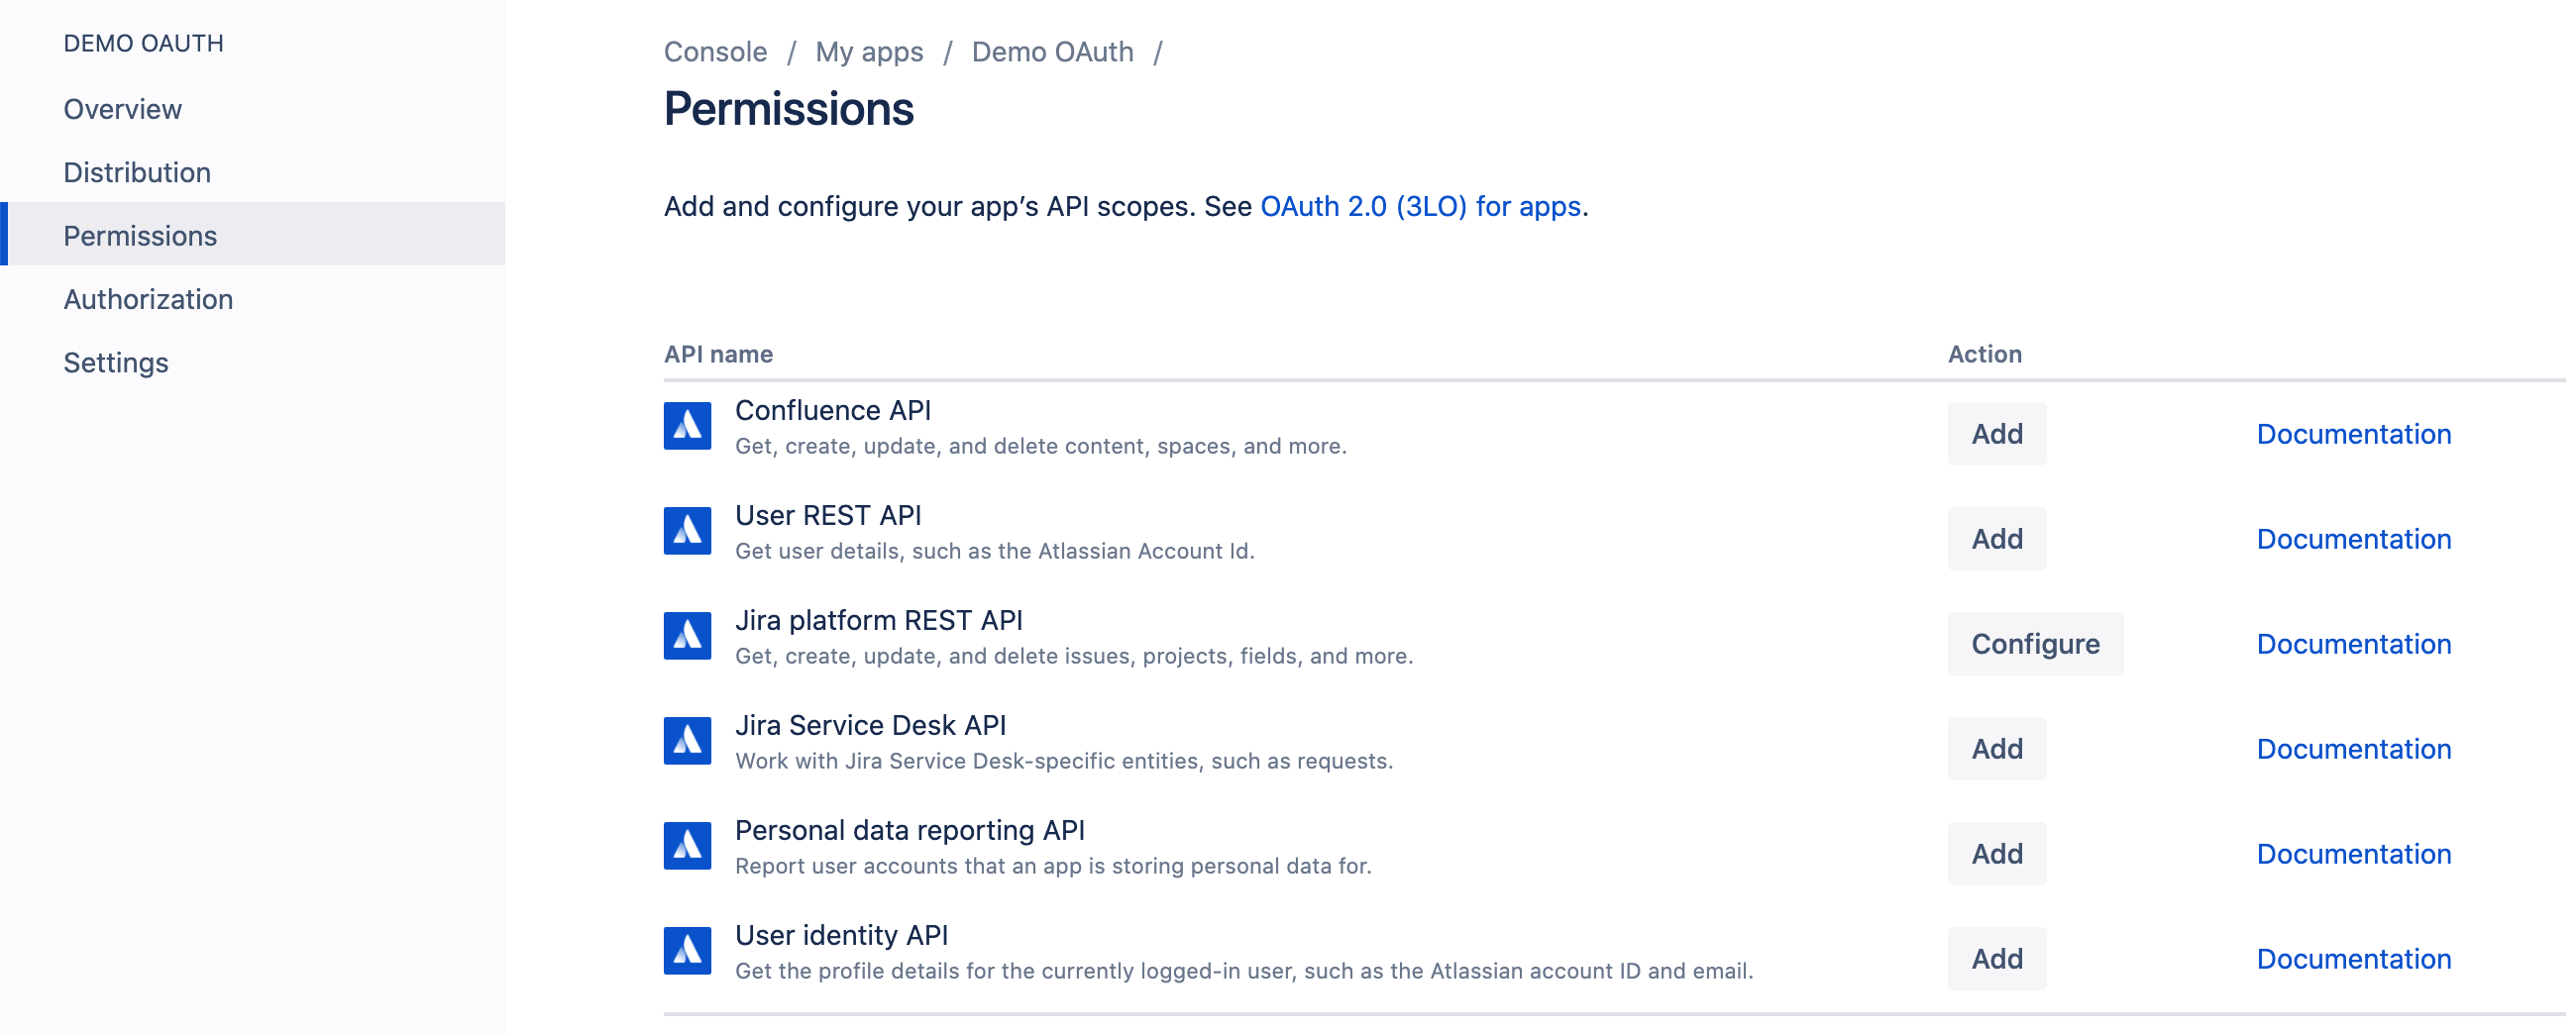
- Configure permissions for the app by clicking on the API you want to use and the permissions /scope you want to request for the application.
- Configure authorization for the application by clicking on configure action. Enter the URL for callback (in this example we are going to set it to http://localhost:8082/oauthCallback)
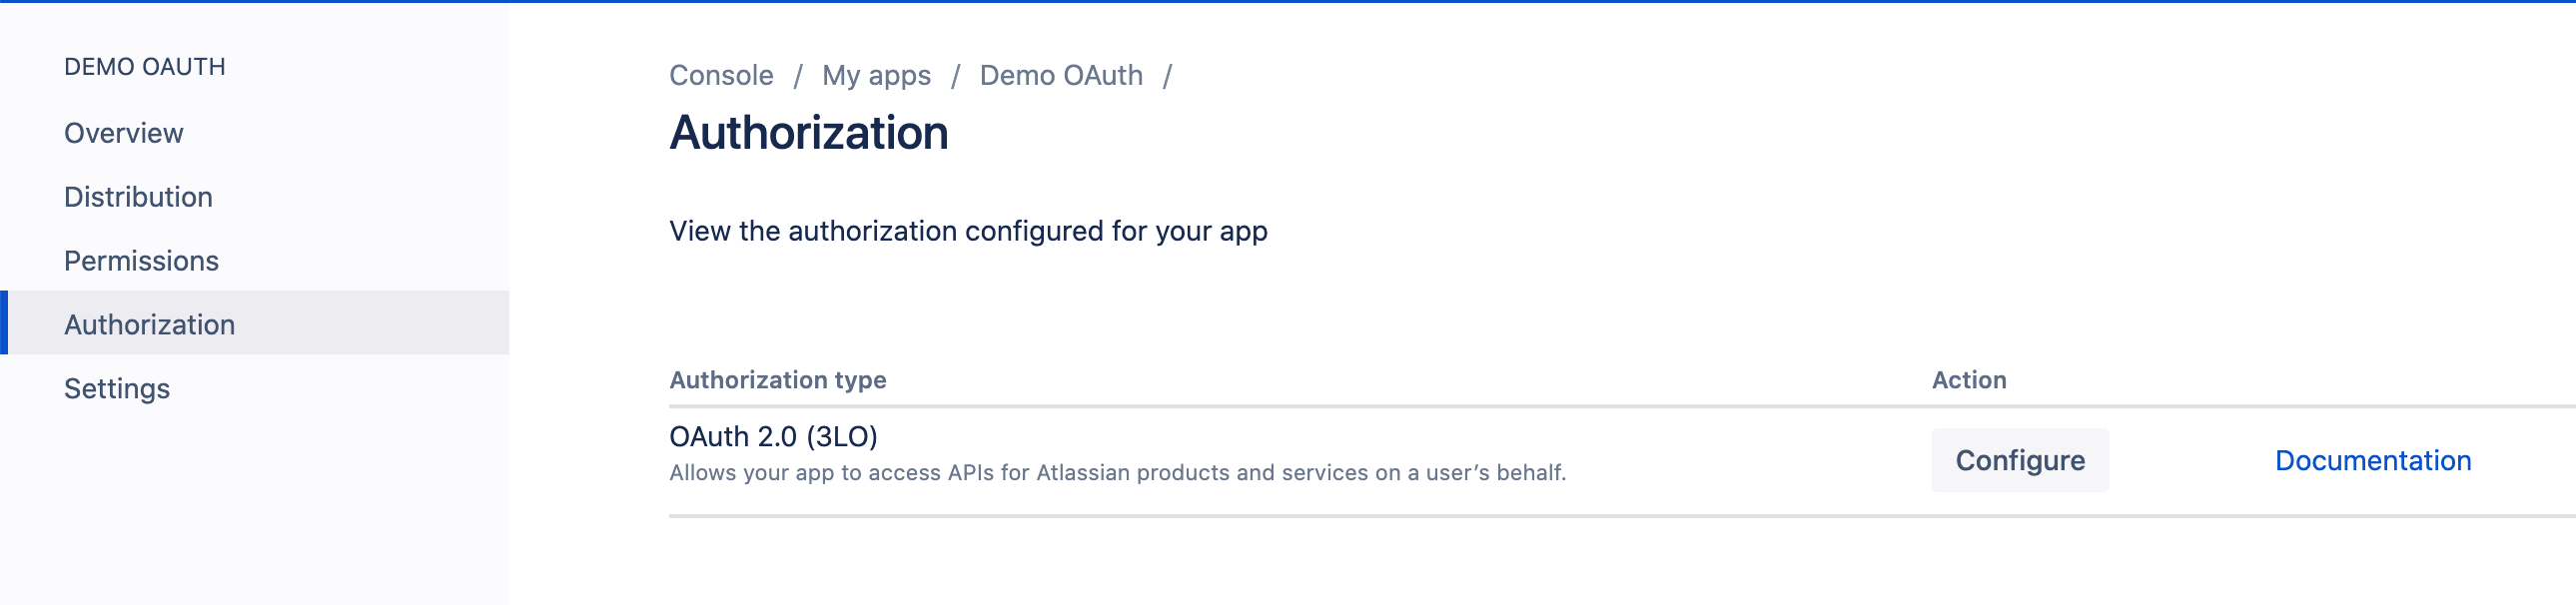
Note that you can test the URL is configured correctly by using the authorization URL generator from the screen where you enter authorization. We will be doing this from the MuleSoft application next.
Step 2: Create simple Mule application to test the Jira API call
Simple Mule application created will have two HTTP Listeners:
- Normal API call will be listened to on 8081 port
- OAuth callback will be on port 8082
Normal API implementation is straightforward like below:
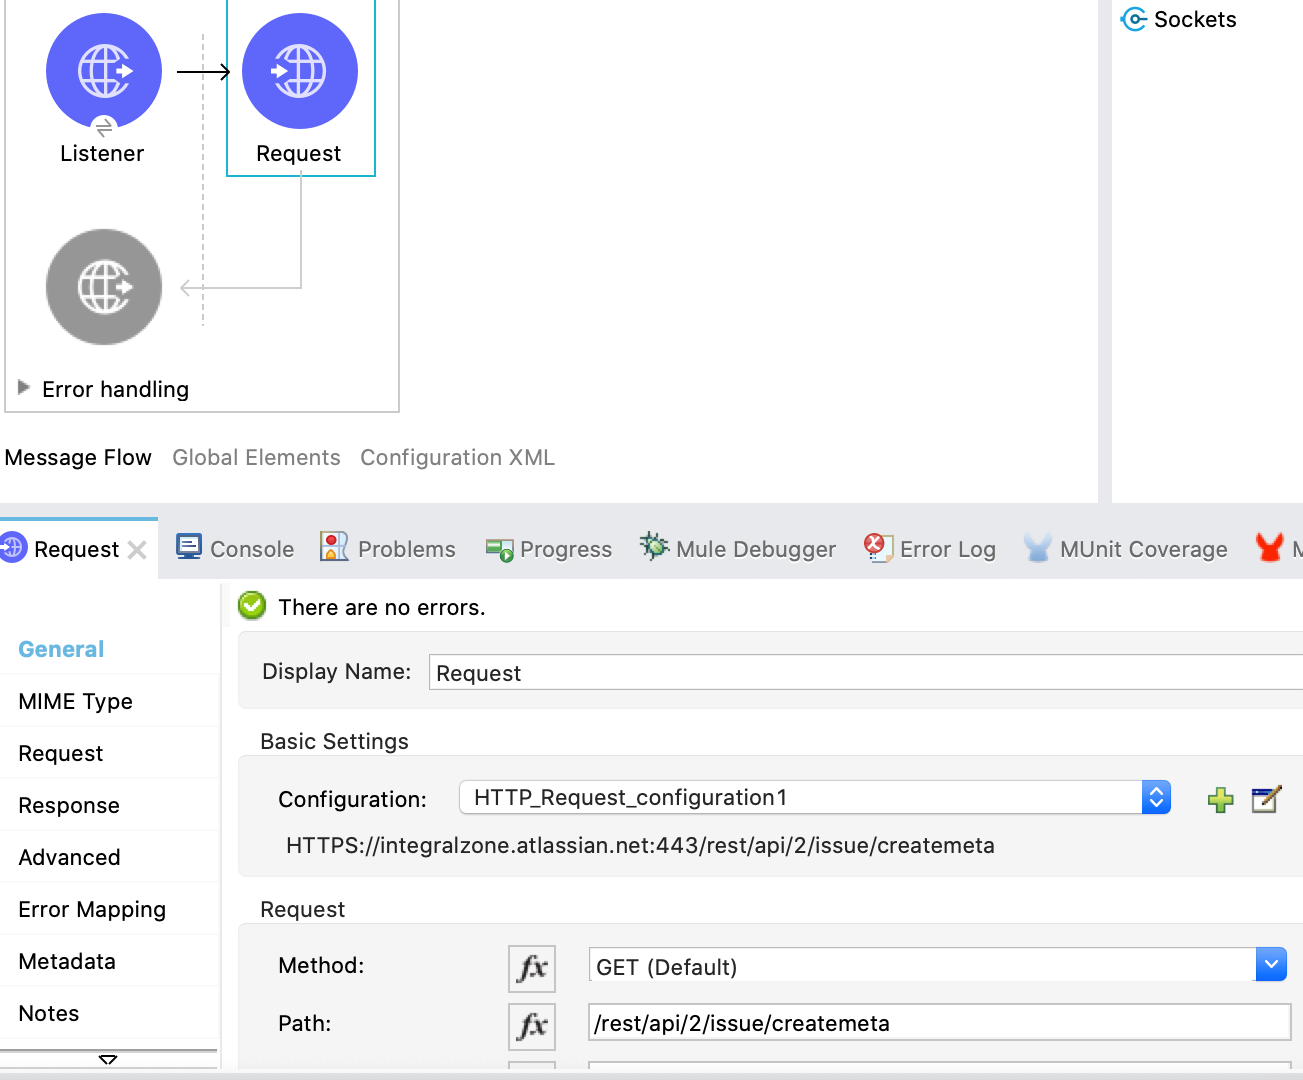
Magic happens in the HTTP configuration section (where the oAuth will be set up).
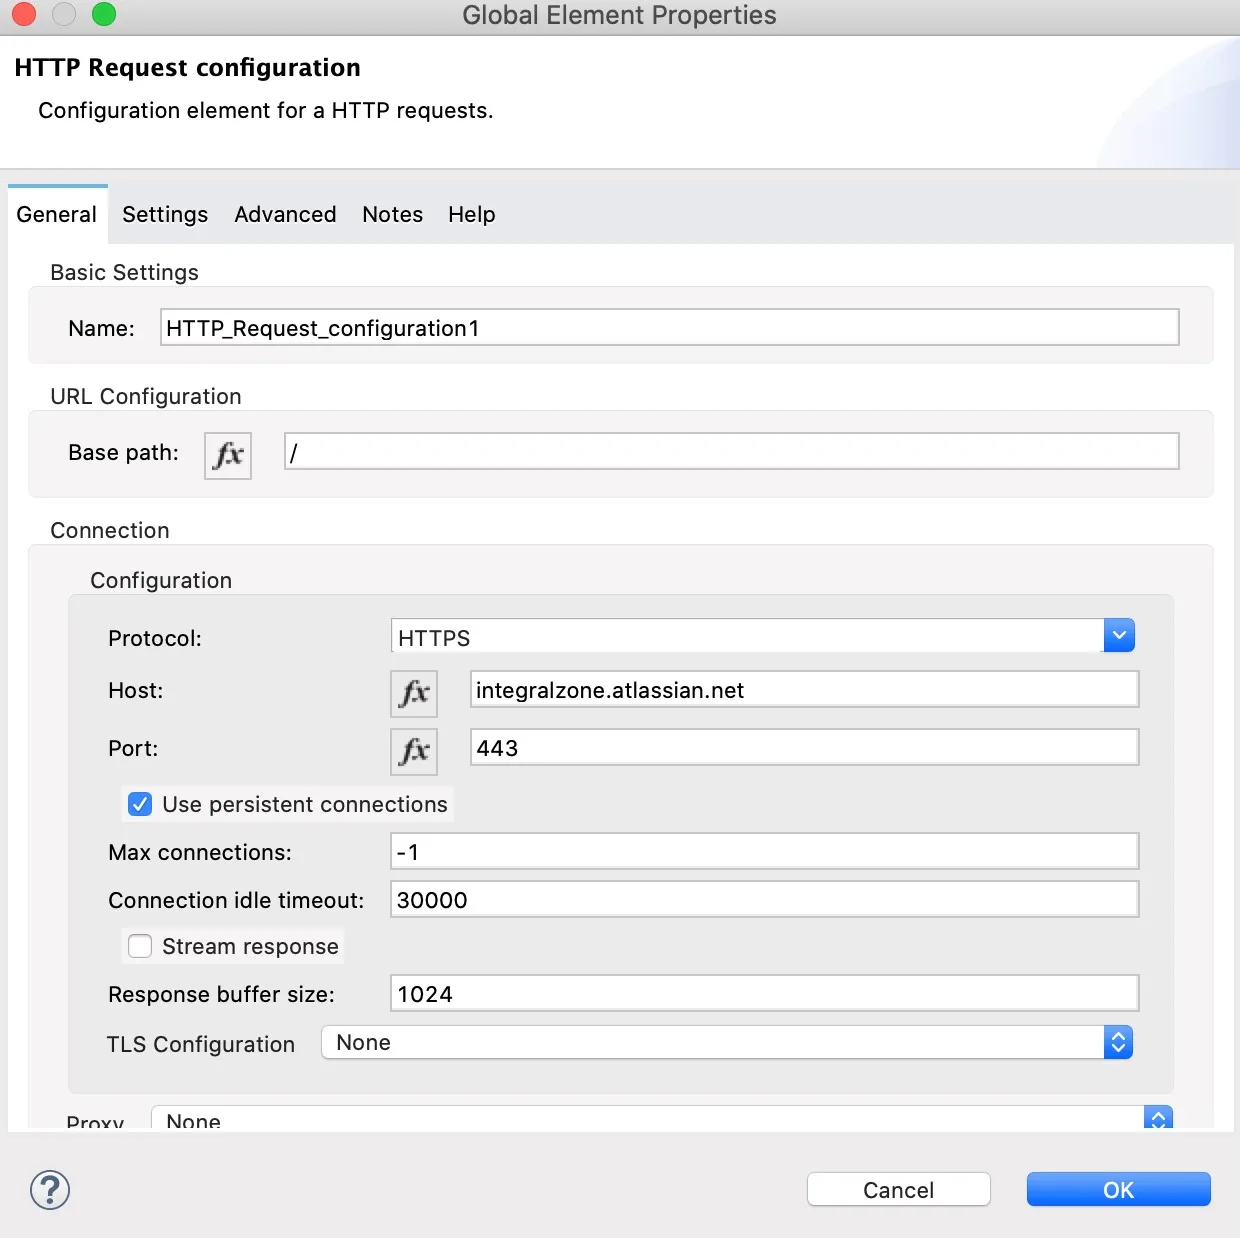
First part of the configuration to set up call to Atlassian server is straightforward:
Security type for the OAuth call is set up as Authorization code grant type as shown below:
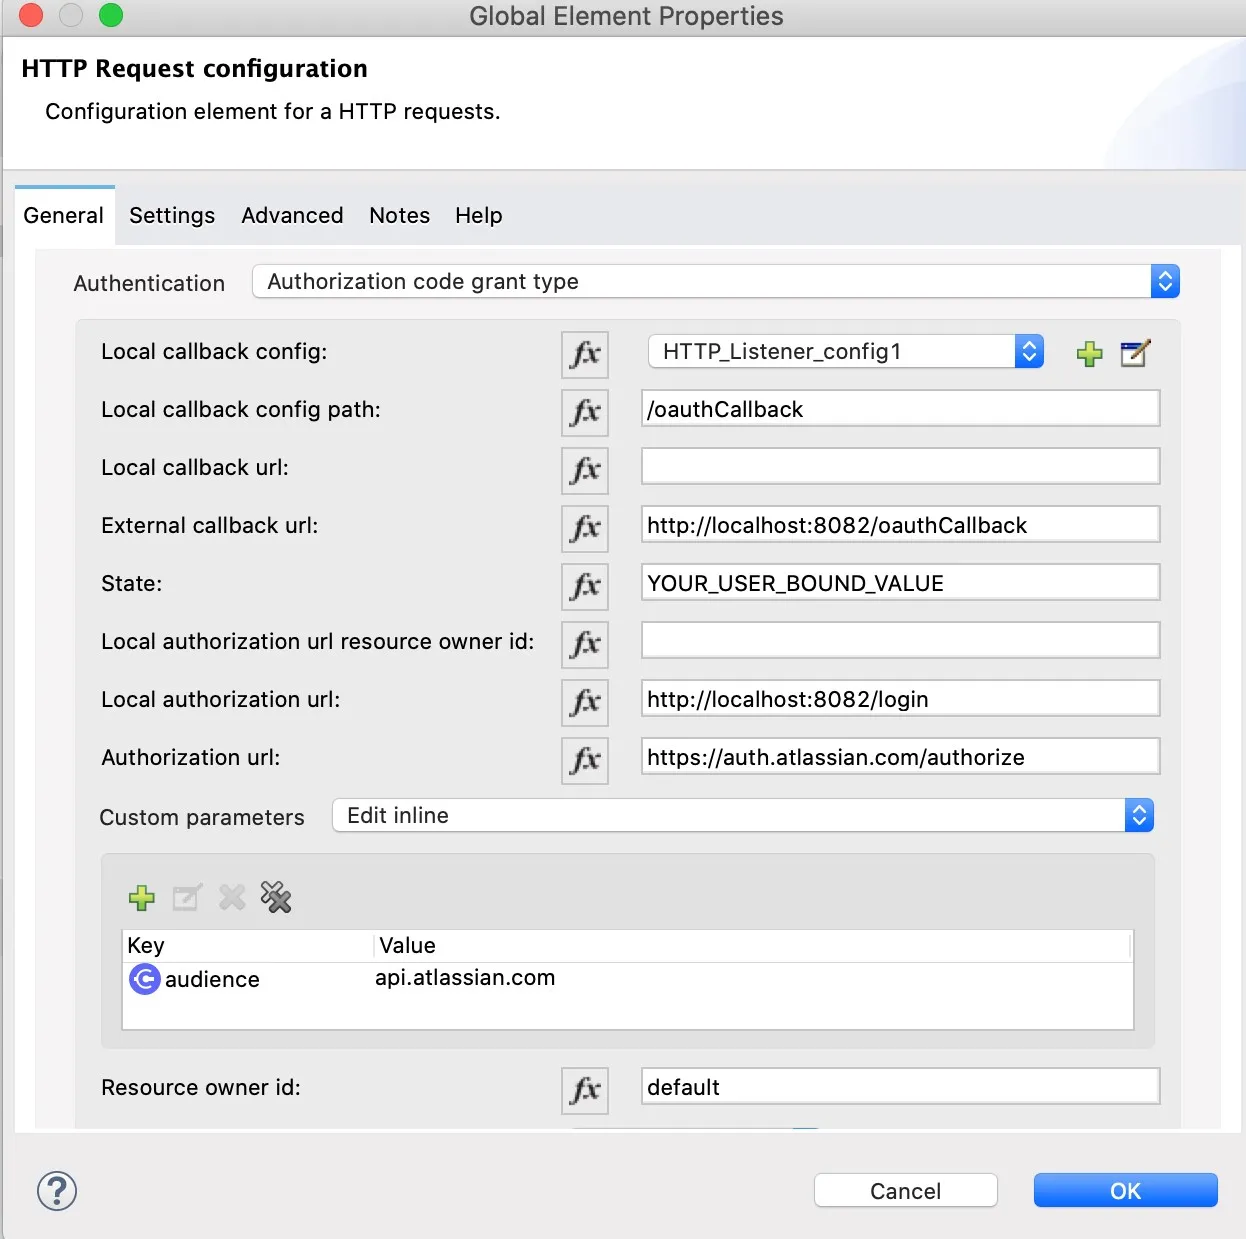
Additional configurations are set up as shown below:
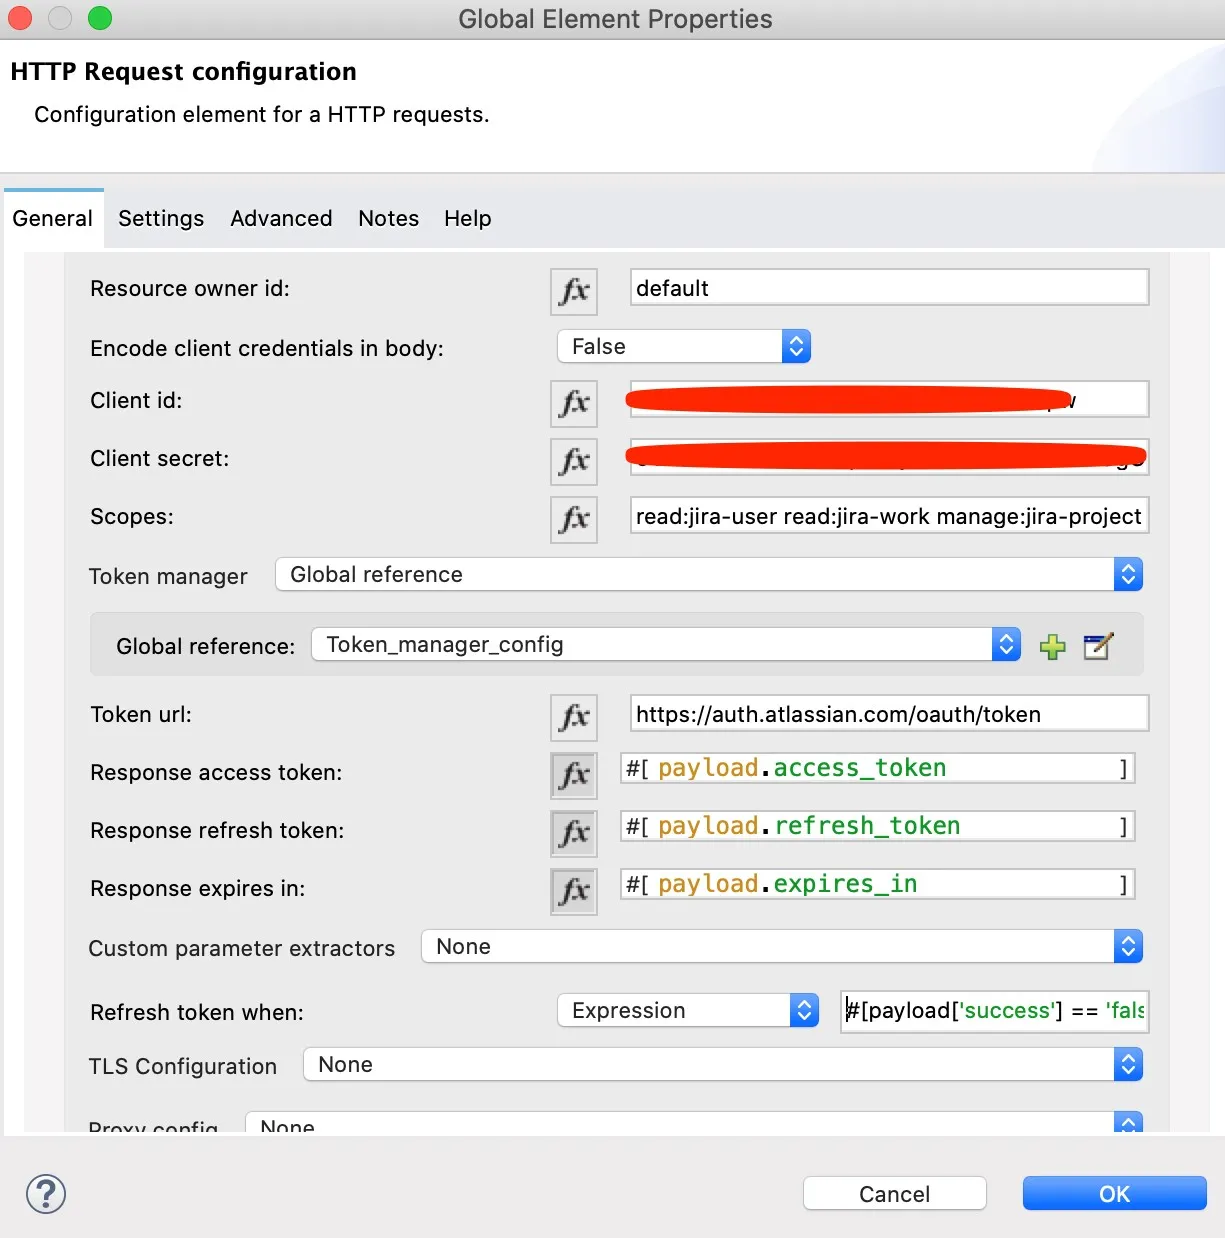
Refresh token when option is set to Expression with the following expression:
#[payload['success'] == 'false' and (payload['errors'][0].code == '601' or payload['errors'][0].code == '602')]Note that for the simplicity of a quick PoC, none of the values are parameterized/encrypted – this would need to be done if you are doing implementing this as more than a developer PoC.
Step 3: Run and test the application
- Try to hit the URL to request a Jira REST api by hitting the local URL. You should get an error since we haven’t retrieved the access token for calling the API like below.

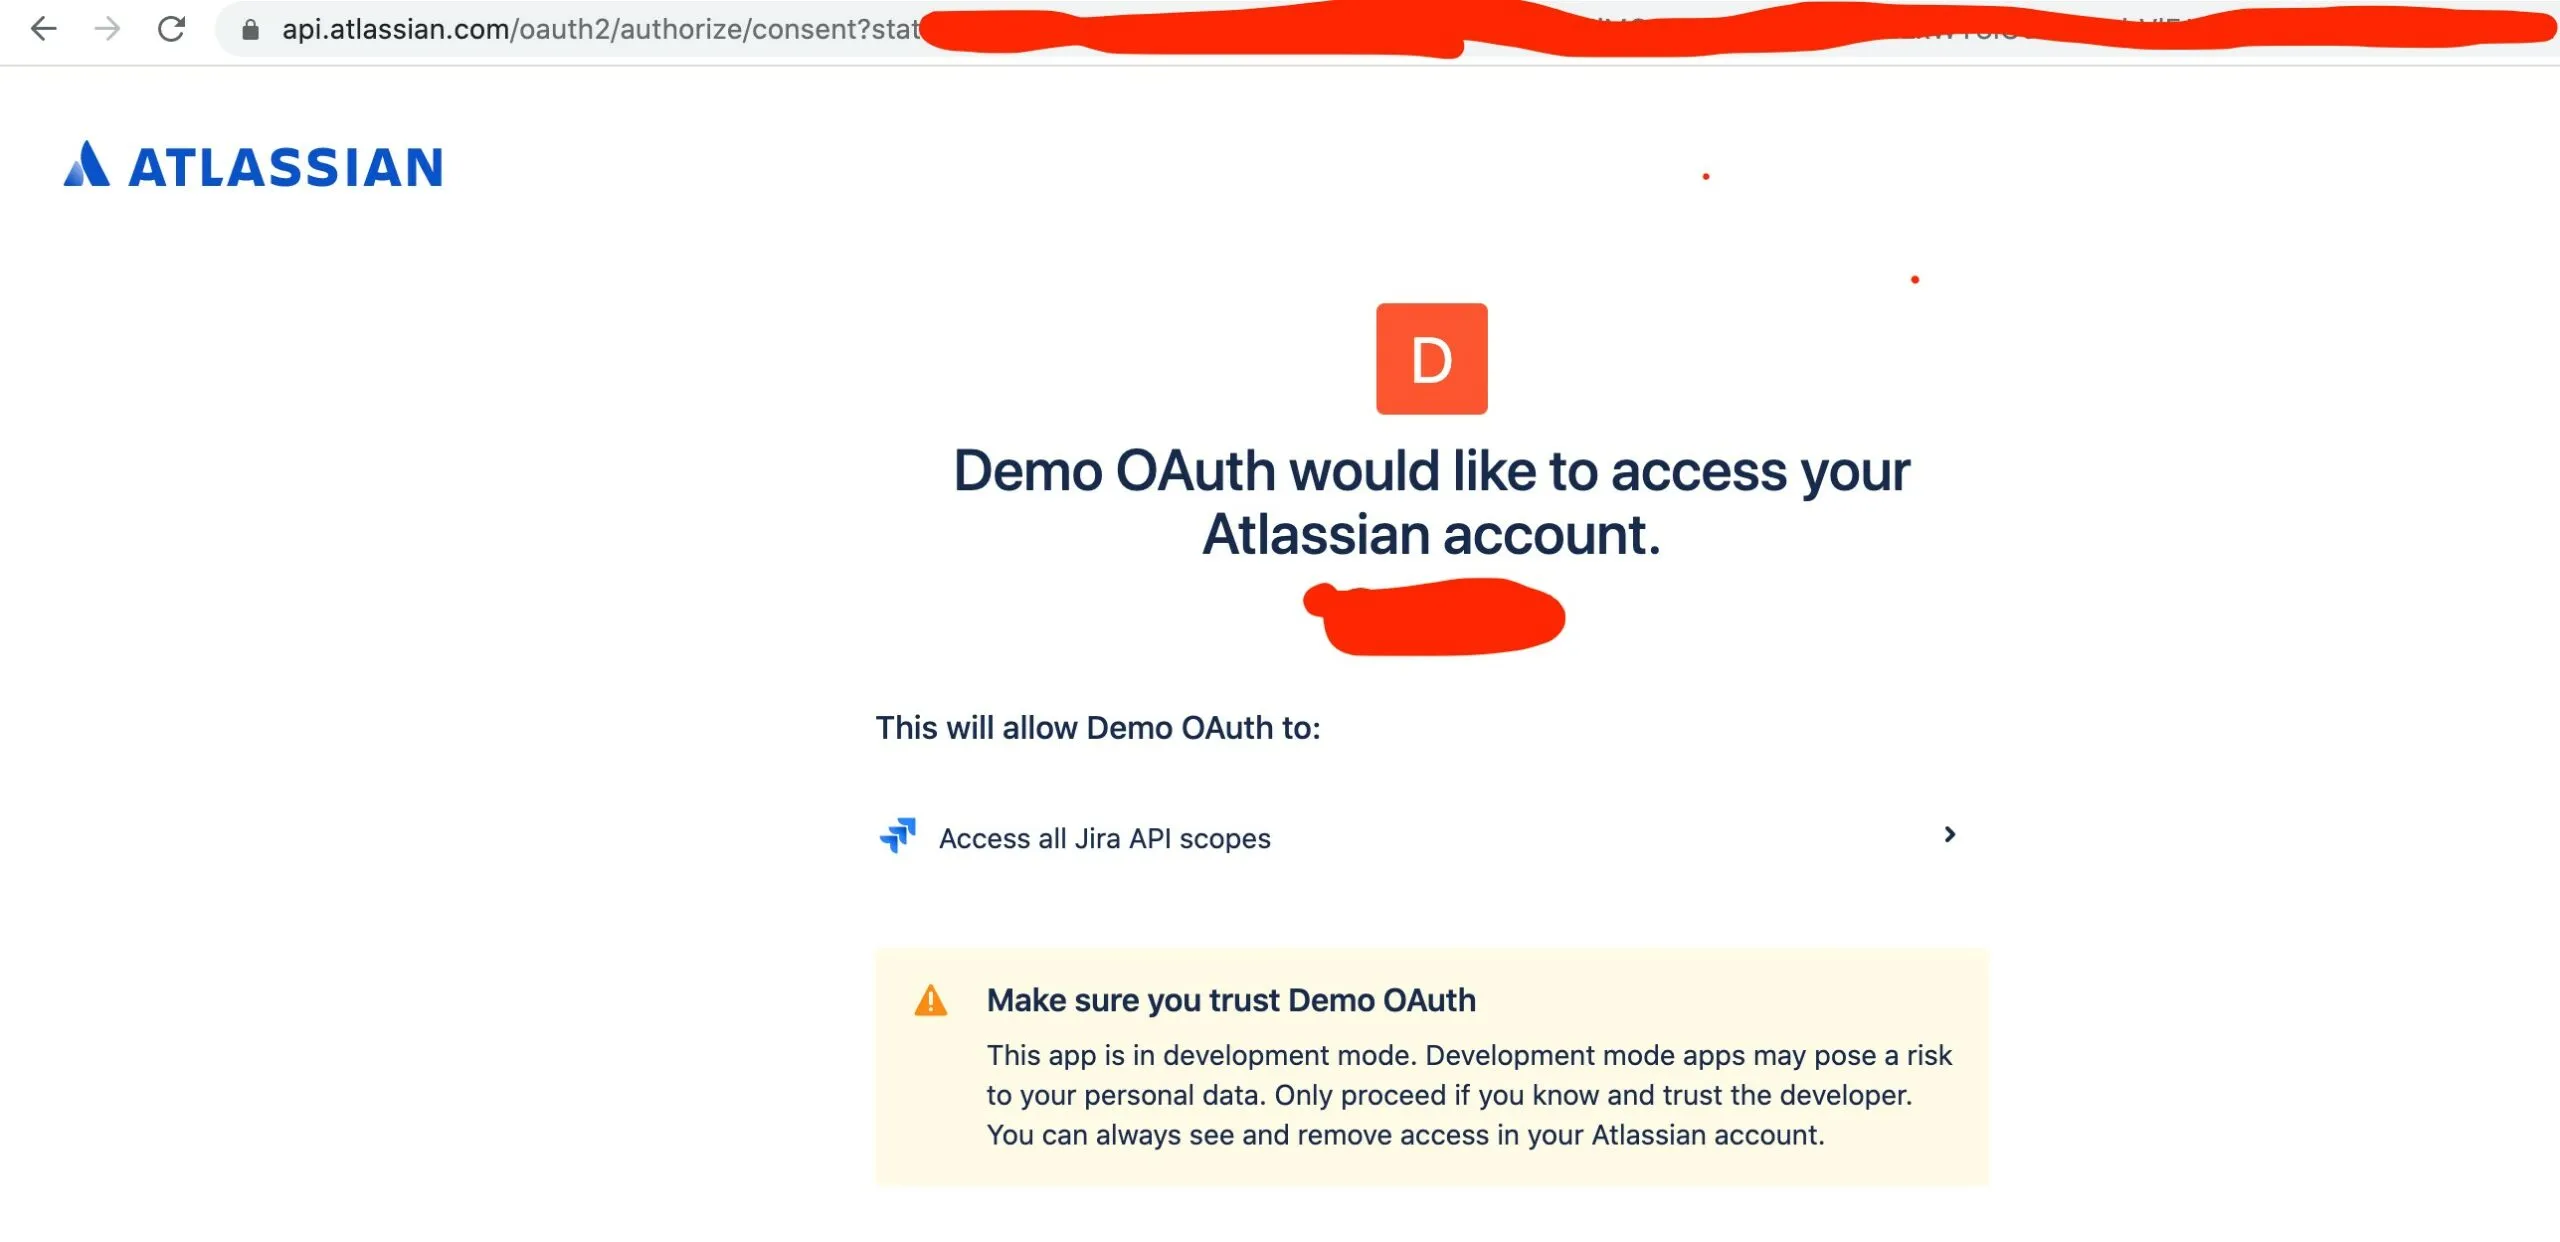
- Hit http://localhost:8082/login – which should redirect you to Atlassian URL for authorization as shown below.
- Once successfully authenticated, you should be redirected to http://localhost:8082/oauthCallback as shown below and access token will be retrieved.

- Try hitting the Jira API URL again and everything should work without a hitch!

Parting thoughts
MuleSoft provides powerful features packed into HTTP Requester itself – which enables to hide the complexity involved in OAuth flows and implement the authorization components easily from day 1. The key is to find the right documentation sections/reference to understand all the features and applying it for the required request types. Please refer to https://docs.mulesoft.com/http-connector/1.5/http-authentication for more information on options available in MuleSoft out of the box as of now.
End Note
Hope you found this article interesting, do drop us a comment below with your inputs, views, and opinions regarding OAuth2.0 calls made simple in Mulesoft
Also, if you are interested in learning more about an exciting new mulesoft code quality and review tool that reduces your Mule project costs by 79%, follow the below link :
https://integralzone.com/iz-analyzer-mule-benefits/
Discover more from Integral Zone
Subscribe to get the latest posts sent to your email.